Gamepad
Please Log In for full access to the web site.
Note that this link will take you to an external site (https://shimmer.mit.edu) to authenticate, and then you will be redirected back to this page.
If you didn't finish the joystick part of last week's lab, go back and do that first!
If you haven't done the this link and take the EHS00509w Electrical Safety Awareness course, you must do it before starting this lab. To do this, search for "509" under the Course Catalog Page, which should find the "Electrical Safety Awareness" course.
Table of Contents
To start, take a look back at prelab section 2 which presents an introduction to soldering to remind yourself of the general process and review the safety information there.
Grab safety goggles and wear them whenever you or someone near you is soldering or clipping wires (i.e., pretty much the whole time we're in lab today). You can keep your goggles if you want (but if you do, please remember to bring them back with you; we don't have an infinite supply of them).
Here is the controller we'll be building today:

We'll be adding the parts to the board, and the PCB connects them to each other. Before we move on to actually building the board, let's make sure we understand how things are connected up.
Each push-button is also connected similarly to what we saw in lab, so that when it is pressed, the voltage on the associated pin (relative to ground) drops to zero; but when it is open, the associated pin sits at 3.3 Volts relative to ground. Each button is connected like this, with the 3.3 Volts being provided by the Teensy microcontroller:
The red "+" and "-" tags there represent a place where the Teensy is set up to measure voltages. By measuring those voltages, we can detect when a button is pressed/released.
The joystick on the left is the same kind we worked with in the week 2 lab, and we're connecting it up in precisely the same way we did in the lab, using each of the two potentiometers inside the joystick as a voltage divider. The voltage source shown here will be provided by the Teensy, which provides a constant 3.3 Volts. Each pot within the joystick is connected like shown below, where the Teensy is set up to measure the voltage between "+" and "-" for each:
R_P and/or alpha, which represent the variables R_P and \alpha, respectively.
Now that we've seen how everything is connected up, let's move ahead with building the circuit.

Start by turning on the soldering iron (the switch on the right-hand side of the base) and adjusting its temperature to around 750. Hold the "Enter" button until the left-most number starts flashing. Then use the up-arrow button to adjust the number, and click enter to move on to the next digit. When all three digits are set, the display will change to show the iron's current temperature.
Also if the sponge on your iron isn't famp, take it to the sink in the center of the room to dampen it a bit. It shouldn't be dripping wet, but just a little damp.
Then grab yourself some solder from the cart (don't take the whole spool, just grab a small piece, you can always go back for more if you need).
The first things we'll add to the board are the two "shoulder" buttons on the top of the board (chosen because they are physically the shortest components). Stick them into the board like so, putting the four pins of each through the four holes they fit into (ignore the fifth hole on each side). Make sure the buttons themselves are on the side of the PCB with text on it (the pins should stick through the other side).
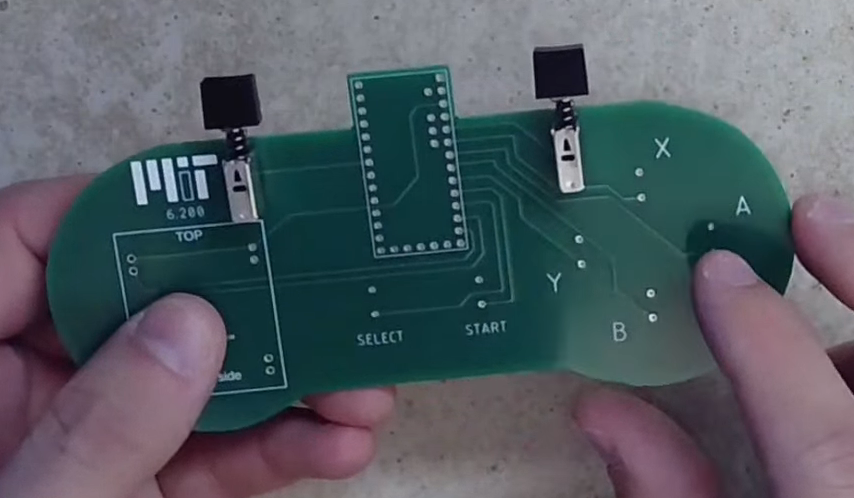
Now, flip the board over and let gravity hold things in place while you solder the pins. We're only going to solder the four pins that are sticking through (feel free to ignore the fifth hole).
Creating a solder joint involves a few steps:
- Heat both the part (the pin sticking through) and the pad (the metal contact on the PCB) for 2-3 seconds using the iron, making sure you're in contact with both.
- Feed a small amount of solder onto the joint. It should "flow" smoothly onto the lead and make a shape like a little Hershey's Kiss.
- Continue heating for another second or so, then remove the iron.
- Let the joint cool before moving things around.
Here is an example of a solder joint:
And here are some examples of bad solder joints (what to look out for as you're working):
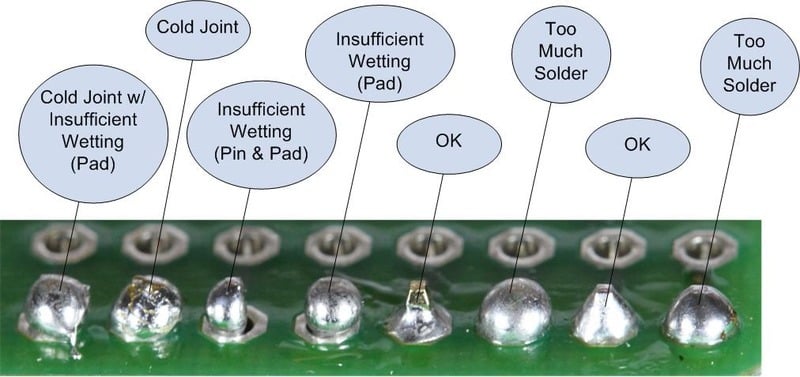
If you do make a mistake, that's OK; we can usually fix it with a little bit of effort. This page from Adafruit discusses how to fix them.
If you want us to demonstrate and/or to take a look at your work as you're going, just let us know! We're happy to help.
Adding the shoulder buttons is shown at this point in the prelab video.
Next, we'll add the six other push-buttons:
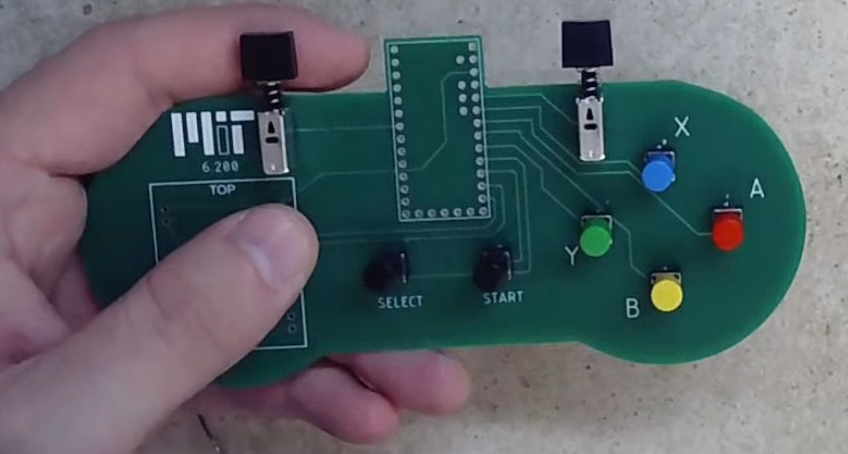
In the same way that we just did, feed the buttons' leads into the associated holes on the board, flip it over, and solder them in place. Flipping the board with all of the buttons in can be a little bit hard, but you can use a piece of cardboard like we did in the prelab video to help keep things in place. We have some cardboard on the cart if you want some. Just make sure you move it away from the iron when you start soldering.
Adding these buttons is shown at this point in the prelab video.
In addition to double-checking your solder joints, for these buttons, we'll also want to make sure that the bodies of the buttons are flush with the PCB board, otherwise they can easily break off.
|
|
|
If yours aren't flush, that's OK; you can often fix it by melting the solder again and pushing the leads farther through the hole while it's melted.
Double-check all of your connections, and double-check that your buttons are sitting flat against the PCB.
Show your work so far to a staff member.
Next, we'll add the a place for our Teensy to live. Do not solder the Teensy directly to the board. Instead, we'll make a socket for it by connecting up some headers like so (the black part should be on the side of the board with the words printed on it):
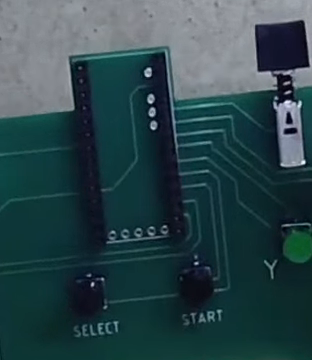
Plug those in to the board and then plug the Teensy into them (this will help to keep them aligned with the board.
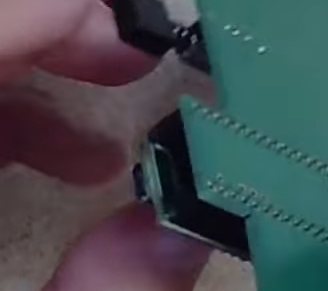
Then:
- Flip the board over again.
- Solder the four corner pins.
- Remove the Teensy and set it to the side for now.
- Solder the rest of the pins.
Adding the Teensy socket is shown at this point in the prelab video, though I didn't follow the advice about starting with the four corner pins (you should, though).
Finally, we'll add the joystick. Like all the other pieces, we'll feed the pins through the board so that the physical body of the joystick is on the side with the words and that the words are oriented the same way on the joystick as on the PCB:
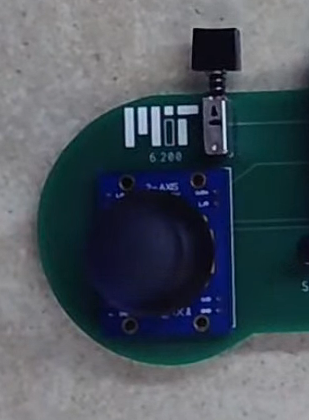
Then go ahead and solder the 8 pins. Be careful with these ones, since they are a little difficult and a little close together. Also, the physical mechanism of the joystick can make it a little bit tricky to keep things straight. Take your time and be careful.
Adding the joystick is shown at this point in the prelab video.
Before we finish up (which will make accessing these solder joints a bit harder), we're going to want to make sure everything is working. We'll do this by programming the Teensy and putting it through the paces a little bit.
Give these instructions a shot, but if you get stuck installing things, let us know and we're happy to help. Don't let yourself spend a bunch of time here.
If you haven't already done so, try working through the instructions for installing Arduino/Teensy/Xinput before proceeding.
There are two versions of the code, and which one you want depends on your operating system of choice (i.e., the one you'll plug this into to play games, if any; not necessarily the OS you're programming the Teensy from). Follow the instructions for the appropriate version for you. Either version can be flashed to the Teensy using any operating system, but they work slightly differently:
-
The "XInput" version works on Windows and GNU/Linux but not MacOS. This version makes the Teensy appear to your computer as an XBox 360 controller, so it should work without any additional configuration. This is the version yo want to use if possible, but because MacOS does not support XBox 360 controllers (even legit ones), it won't work there.
-
The "Joystick" version makes the Teensy appear to your computer as a generic joystick and should work on any operating system, but the mapping from buttons on the controller to the buttons to be used in a game won't be able to be determined automatically (and it may differ from game to game), so you might need to do some additional configuration within each game to get things to work.
Follow one of these sets of instructions depending on which version you want:
-
To install the XInput version:
- Download gamepad_xinput.ino, save it on your computer, and open it with Arduino/Teensyduino.
- From the menu, under
Tools\toBoard: ...,\toTeensyduino, selectTeensy 3.2/3.1. This tells Arduino what kind of board we're programming. - Plug your Teensy into the computer via USB cable (we have extras if you need one) and double-tap the button within 0.5 seconds of plugging it in.
- From the menu, under
Tools\toUSB Type: ..., chooseXInput. - Click the second button from the left, which looks like a rightward-pointing arrow (it should say "Upload" when you hover over it). This should compile things and send the result to the Teensy with no orange error messages.
-
To install the Joystick version:
- Download gamepad_joystick.ino, save it on your computer, and open it with Arduino/Teensyduino.
- From the menu, under
Tools\toBoard: ...,\toTeensyduino, selectTeensy 3.2/3.1. This tells Arduino what kind of board we're programming. - Plug your Teensy into the computer via USB cable (we have extras if you need one) and double-tap the button within 0.5 seconds of plugging it in.
- From the menu, under
Tools\toUSB Type: ..., chooseSerial + Keyboard + Mouse + Joystick. - Click the second button from the left, which looks like a rightward-pointing arrow (it should say "Upload" when you hover over it). This should compile things and send the result to the Teensy with no orange error messages.
If you run into any errors, let us know, and we're happy to try to help.
Now let's test and see whether everything is working. If you unplug and re-plug the USB cable connecting your Teensy to your computer and open up this page, you should see it respond when you move the joystick and/or push buttons. If not, let us know and we can help.
If you want a more realistic test, we also have two computers set up near the parts cart with games loaded up and ready to try!
Demonstrate your working game controller to a staff member.
To finalize things, we'll do away with the sharp edges on the back of the board and cover it with a piece of acrylic to make it a little less painful to hold.
Clip the leads off of the buttons (you don't need to clip the ends of the joystick pins or the Teensy socket pins, only the buttons). Wear your goggles while doing this!! and don't let the little clippies fly everywhere.
Trimming these leads is shown at this point in the prelab video.
Use the double-sided tape to attach the acrylic to the back. The holes should line up with the solder joints. You can stick the tape down like so:
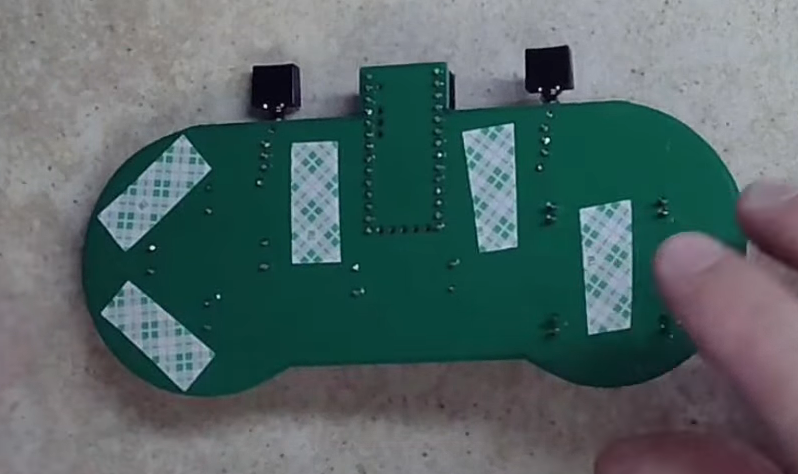
then pull the backing off and stick down the acrylic to it:
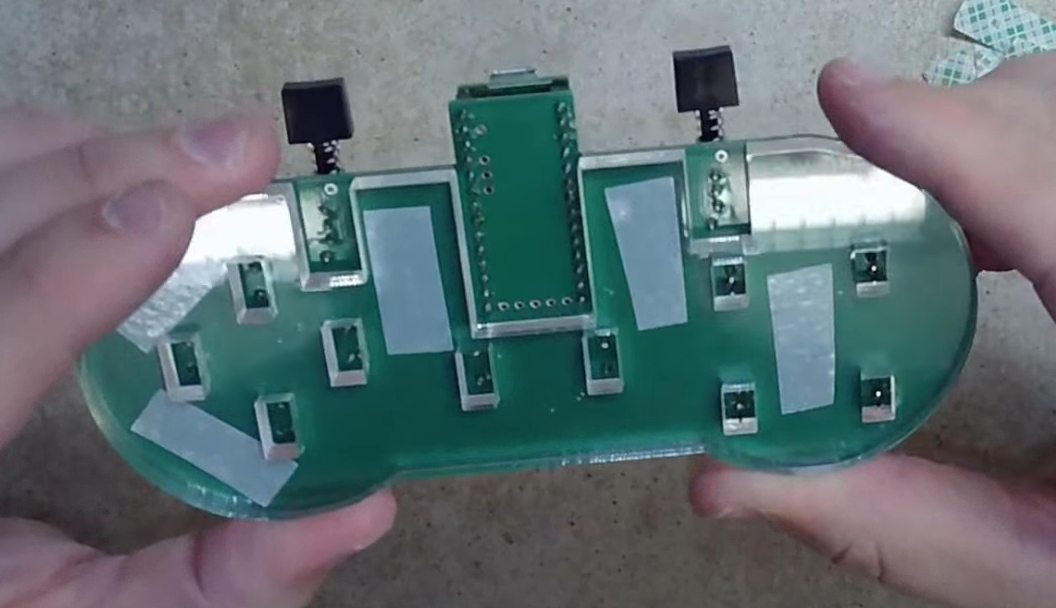
Adding the acrylic backing is shown at this point in the prelab video.
Woo-hoo, we're all done! The gamepad (including the Teensy) is yours to keep.
Before you leave, though, clean up by doing the following:
- Turn off your iron and vent fan.
- If you're not taking the safety goggles with you, put used ones in the cardboard box on the floor.
- Wash your hands with the special de-leading soap.